Pineapple Apricot Jam
This post may contain affiliate links, that if you make purchases through, I will earn a small commission.
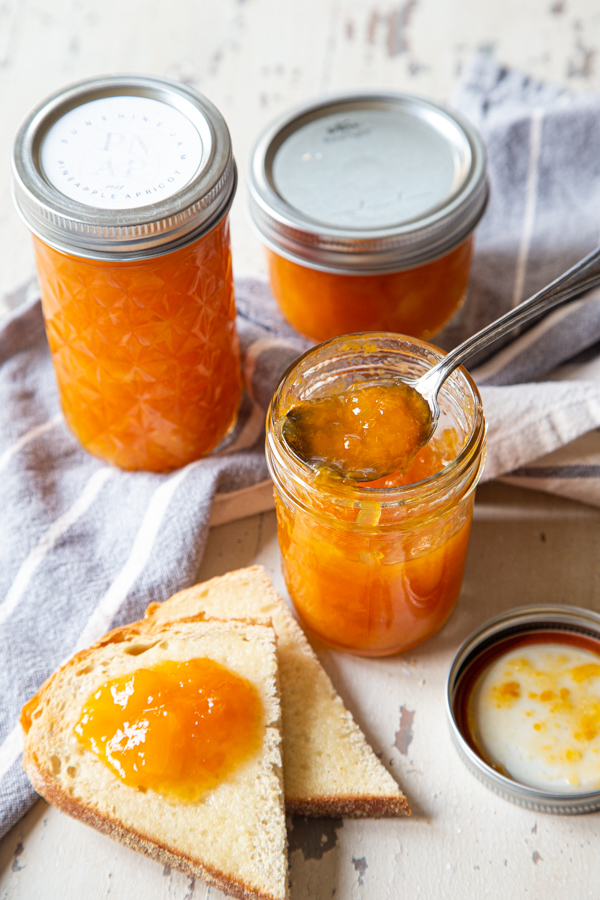
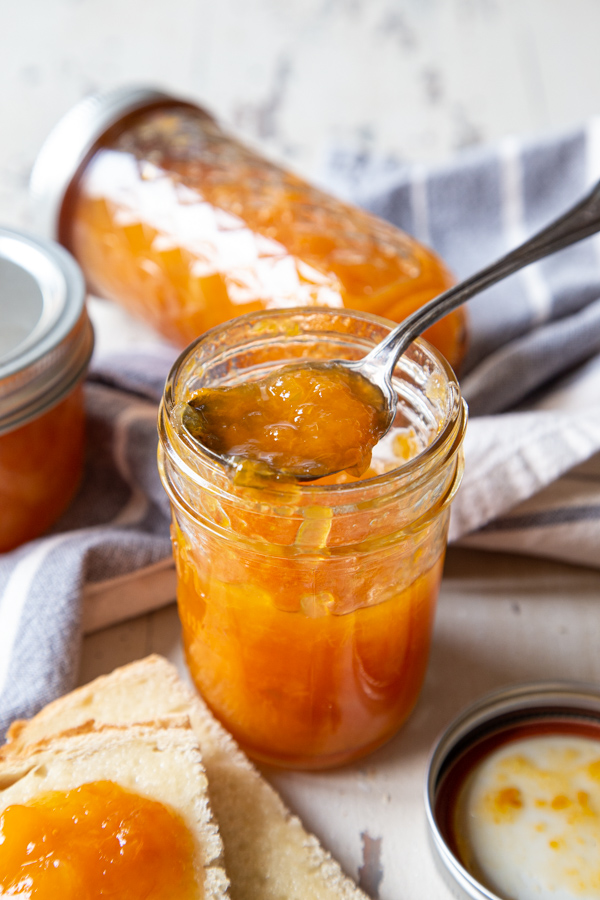
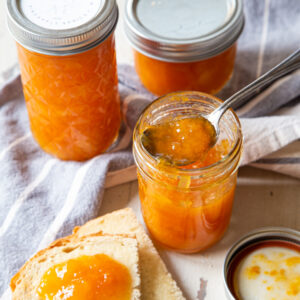
Give your next PB&J an upgrade with homemade Pineapple Apricot Jam. With the perfect balance of sweet-and-tart, this jam recipe is sure to be a new favorite.
If you’ve never had Pineapple Apricot Jam before, you’re probably thinking that this is a pretty unique combination of ingredients. And it is! But you might also be surprised to learn that this is a classic recipe that’s been floating around for many decades. It’s hard to find exactly where it came from, but my best guess from internet sleuthing is that it was developed by Sure-Jell, a maker of fruit pectin.
In my family we lovingly refer to this as “Sunshine Jam” because it is absolutely sunshine in a jar!
The traditional recipe for Pineapple Apricot Jam is made with canned pineapple and (optional) maraschino cherries; some recipes use dried apricots, while others use fresh. I decided to switch things up and use fresh apricots and fresh pineapple, which cuts the sugar content of the recipe a bit. The result is a more balanced flavor, with the tart, acid notes of the apricots and pineapple shining through. I also like using fresh apricots because it yields more of a jammy texture, rather than being chutney-ish. (Chutney-ish isn’t a word, but you know what I mean, right?!)
What You’ll Need
You can use either fresh or frozen pineapple and apricots for this Pineapple Apricot Jam recipe, but do avoid canned pineapple. The flavor is much sweeter than fresh or frozen, and it will throw off the sugar content of the recipe. Here’s a rundown of what you’ll need:
- Apricots
- Pineapple – If you’re using fresh, save yourself some time and buy the pre-cut chunks in the produce section!
- Sugar
- Water
- Lemon juice
- Granny Smith apple – This is another one of my tweaks to the original recipe. Tart Granny Smith apple—just a little bit!—helps balance the flavors in this jam. Apple is also a natural source of pectin, which helps jam thicken.
Do You Peel Apricots When Making Jam?
This is up to you! I don’t peel apricots for jam because I like the texture the skins add, but you can take them off if you prefer. To do this, blanch the apricots by placing them in boiling water for 2 minutes, then transferring them to an ice bath. The skins should slip right off.
How to Make Pineapple Apricot Jam
Don’t be intimidated by canning! It’s a lot easier than you think and once you get started, you’re going to be unstoppable. That said, you can also make the jam and pop it in the refrigerator without canning it if you’re going to eat it within a week or two.
Start the jam. Combine half the apricots, the sugar, water, and lemon juice in a Dutch oven or stock pot, and bring the mixture to a boil. Reduce heat to low, then let the jam simmer for about 25 minutes, stirring frequently.
Add more fruit. Once the jam mixture has thickened a bit, add the rest of the apricots and the pineapple. Simmer for another 25 minutes, using a potato masher or wooden spoon to break up any large pieces of fruit. The jam is done when it reaches 217 to 220ºF on an instant read thermometer.
Prepare the canning jars. If you’re going to can this Pineapple Apricot Jam recipe, wash your jars and keep them warm in a pot of hot water. Place a clean dish towel on your countertop and use a jar lifter to remove the jars from the pot of water and drain them well.
Fill the jars. Turn the jars upside down to dry, then ladle the hot jam into the jars, leaving 1/4-inch of headspace. Use a skewer to pop any air bubbles in the jam, then wipe the rims and put on the lids and rings to seal, being careful not to screw the rings on too tight.
Process the jam. Carefully lower the jars into a large pot of boiling water. Once the water returns to a boil, cover and set a timer for 10 minutes (for an altitude below 1,000 feet), 15 minutes (between 1,001 and 3,000 feet), 20 minutes (between 3,001 and 6,000 feet, or 25 minutes (above 6,001 feet).
Finish the jam. Turn off the heat and remove the lid from the pot. After 5 minutes, use a jar lifter to remove the jam from the hot water bath and put the jars on the towel you’ve placed on the countertop. You’ll hear the jars pop as they cool, which means they’ve sealed. After the jars have cooled, you can store them in the pantry for up to a year.
Tips for Success
These tips aren’t just for this Pineapple Apricot Jam recipe—they apply to any jam, preserve, or jelly!
- Use the best fruit you can find. Making jam isn’t the time to use under-ripe or past-its-prime produce. You want to get fruit at the peak of freshness, otherwise you’ll end up with lackluster jam.
- Don’t change the recipe. If you love to cook, you probably love making changes to recipes, but when you’re canning, you need to follow the recipe as written. Making changes can cause your jam to spoil sooner.
- Buy bottled lemon juice. Yep, you know those little plastic lemon-shaped bottles they sell at the grocery store? That’s what you need when you’re making jam. It’s pasteurized and has a consistent pH from one bottle to the next, while fresh lemon juice has more variation. Since canning is a science, consistency is important!
Can You Freeze Pineapple Apricot Jam?
Yes, you can totally freeze this jam if you prefer not to can it. Ladle the hot jam into clean jars, let the jam cool, then screw on the lids and pop them in the freezer. Use the jam within 2 to 3 months.
Serving Suggestions
Naturally, this Pineapple Apricot Jam recipe is good on toast, peanut butter and jelly sandwiches, English muffins, and all of your typical delivery methods for jam. Here are some more ideas to try:
- Get a good, buttery cracker, top it with a sharp cheddar, and then top the cheddar with a spoonful of this jam. So! Tasty!
- And speaking of cheese, if you haven’t tried making a grilled cheese sandwich with jam, you’re missing out. In addition to sharp cheddar, havarti or butterkäse cheese would be excellent.
- Three words: Marzipan. Jam. Cookies. Almond-y marzipan is a natural pairing for apricot.
- Serve jam alongside a warm batch of British Cream Scones.
- Make Apricot Almond Linzer Cookies into Pineapple Apricot Linzer Cookies.
- Use this jam in your favorite baked brie recipe.
- Layer Pineapple Apricot Jam with vanilla yogurt, toasted coconut, and granola for a tropical-inspired parfait.
- Spoon it over a stack of pancakes.
- Use it as a glaze for pork or chicken.
Pineapple Apricot Jam
- Prep Time: 25 minutes
- Cook Time: 75 minutes
- Total Time: 1 hour 40 minutes
- Yield: 4–6 (8-ounce) jars 1x
- Category: Canning
- Method: Stovetop
- Cuisine: American
Description
An upgraded version of an old-fashioned recipe, this Pineapple Apricot Jam has the perfect balance of sweet and tart.
Ingredients
- 2 Pounds Ripe Apricots, pitted and cut into ½” pieces. Fresh or frozen.
- 1 pound Fresh Pineapple Chunks, cut into ½” pieces. Fresh or frozen.
- 2 cups Sugar
- ½ cup Water
- 2 Tbsp Lemon Juice
- ½ cup fresh grated Granny Smith Apple
Instructions
- In a Dutch oven or a stock pot, bring half of the apricots, sugar, water, and lemon juice to a boil. Reduce the heat to low and allow the jam to simmer. Stir frequently for about 25 minutes, or until the mixture has started to thicken. Add in the remaining apricots, pineapple, and shredded apple. Continue to simmer for another 25 minutes, breaking up the larger pieces with a potato masher if needed.
- Bring the mixture up to 217-220 degrees when measured on an instant read thermometer
- To can the jam, wash jars and keep warm in a hot pot of water. Place a dish towel on the counter, and using a jar lifter, remove the jars and drain them of water. Place them upside down to dry momentarily. Ladle the hot jam into the hot jars, leaving ¼” headspace in the jars. Slide a skewer around the inside of the jar to pop any air bubbles that may have formed. Wipe the rim of the jar clean, add the lids and screw on the rings until fingertip-tight, being careful not to over tighten.
- Lower the jars into a boiling pot of water. When the water returns to the boil, set the time for 10 minutes (if your altitude is below 1,000 feet.) Up the time to process to 15 minutes (between 1,001 and 3,000 feet), 20 minutes (between 3,001 and 6,000 feet), and 25 minutes (above 6,001 feet).
- Remove the lid from the pot, and turn off the heat. Allow the jars to cool in the water for 5 minutes, then using a jar lifter remove the jam from the hot water bath, and cool on a towel on the counter. Jars will make a popping sound as they cool to indicate that they have sealed. Cool completely and store for up to a year. Ready to eat whenever you are ready!
Is there a way you could make your recipes printer friendly? Many look amazing and would love to try them, but I am old school I guess and prefer to print and put into a recipe book. Thanks!
Hi Pat!! I totally understand! I am working on a issue right now with the printer friendly recipes. You’re not the only one who was having issues. I will EMAIL you the recipe if that is more helpful until I can get my technical issue worked out 🙂 Keep your eyes peeled!
thank you, what a fun jam that I would never find on a store shelf, love the idea of homemade too!
It’s the BEST! My mom literally called me the morning she opened it to RAVE about it!
When do you add the grated apple?
Oh sorry Connie! You add it in with after the pineapple and apricot has broken down. I’ll update the recipe accordingly!
Doubled recipe and it will not reach temp. Taste way bitter. What do I do