
Yup, this post is exactly what you think it is! Another baby announcement! Here we are knock knock knocking on the end of my...
Read More Some Bunny Is Going To Be A Big Brother!
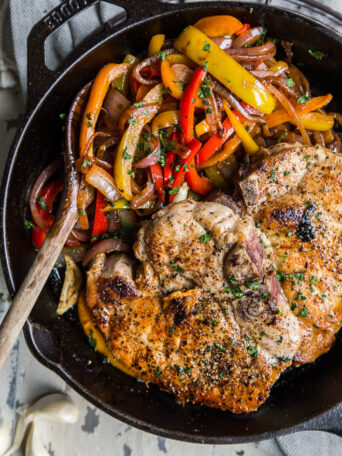
This 30 minute meal of skillet pork chops with sweet and sour peppers will liven up your weeknight meal rotation! And it’s a perfect...
Read More Skillet Pork Chops with Sweet and Sour Peppers
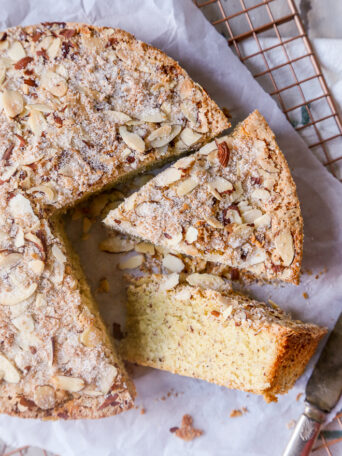
An easy Italian Almond Tea Cake is perfect for your spot of tea or coffee, with light almond and lemon flavors and a sprinkle...
Read More Easy Italian Almond Tea Cake

This post has been sponsored by Prego®. All thoughts and opinions are my own. Easy Alfredo chicken lasagna rolls are filling, easy, and fun...
Read More Easy Alfredo Chicken Lasagna Rolls

Brown Butter Chocolate Chip Skillet Cookie is an easy crowd pleaser when you need a chocolate chip cookie fix! Brown butter makes this ultra...
Read More Brown Butter Chocolate Chip Skillet Cookie
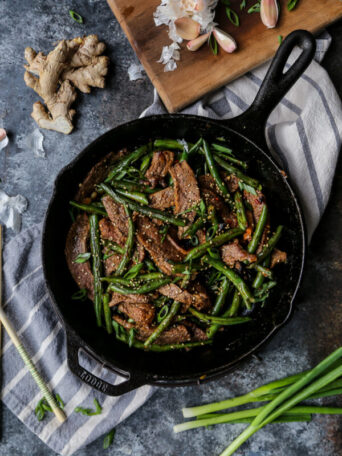
Don’t miss out on good take out while on Whole30! This Whole30 compliant beef and blistered green beans tastes better than any takeout with...
Read More Whole30 Compliant Beef and Blistered Green Beans